Author: Laila
Published: 2024-03-12 11:06:36 | Updated:
Install an eSIM on iPhone Manually (Quick & Easy Guide)
Thinking of using an eSIM on your iPhone by using the QR code scan? No problem! Here's a step-by-step guide to installing an eSIM profile manually:
What you'll need is your iPhone
(make sure it supports eSIM & device is unlocked)
There are 3 ways to check if your device is compatible
- check the list here : https://www.upesim.com/en/installation.html
- dial the number *#06# and press call (if the iPhone display an EID number) it's eSIM compatible
- the best way is to download our UPeSIM application, the application will display you a message after registration if your device is not compatible with eSIM, to download the app click here
The eSIM QR Code and activation code
(provided by UPeSIM per email)
- The eSIM QR Code
- The Activation Code
The activation code is a unique string of characters that links your iPhone to the eSIM profile. It often comes alongside a QR code, but you can enter it manually too. Here's an example of what the code might look like:
Example :
- SMDP = rsp-eu.example.com
- CODE = XXEC5D8D9CD2505965FF279EFE1E48XX
Now let's Install the eSIM
| 1 - Open Settings on your iPhone | 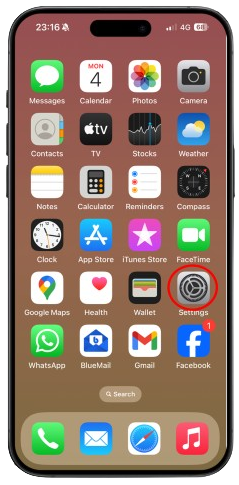 |
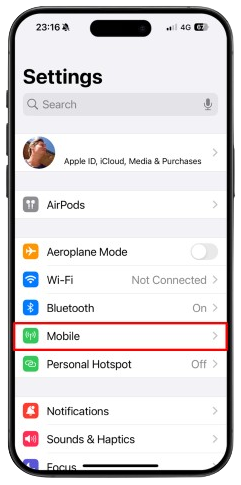 |
2 - Tap on Mobile or Cellular or Mobile Data (depending on your iPhone model). |
|
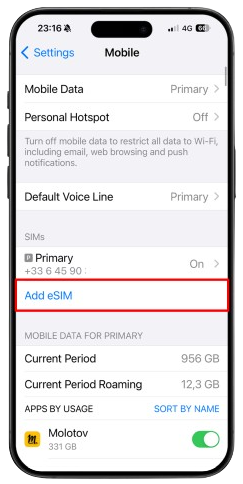
3 - In the SIMs section, tap on: Add eSIM or Add Cellular Plan. |
 |
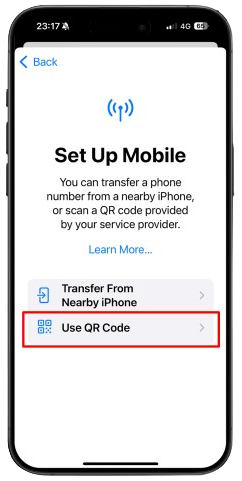 |
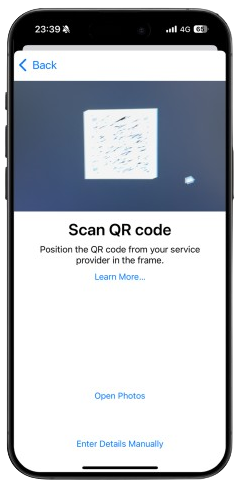
4 - Choose Use QR Code |
|
5 - You can use 3 options to install the SIM
|
|
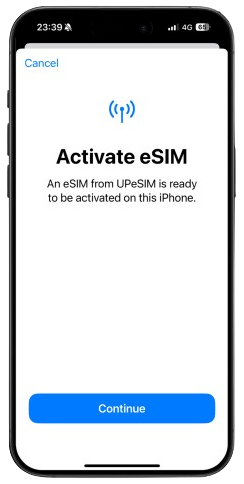 |
6 - click on Continue to install the eSIM |
|
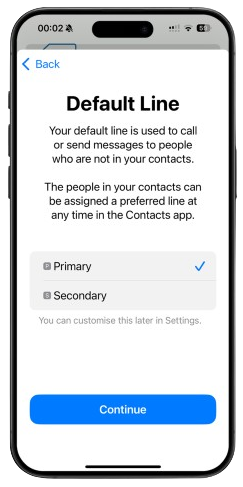
7 - Set your "country line" as Default Line
|
 |
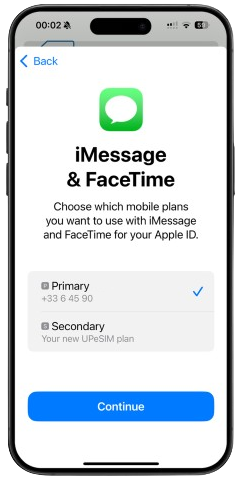 |
8 - Set your "country line" as Line for :
|
|
9 - Set your eSIM line for Mobile Data :
|
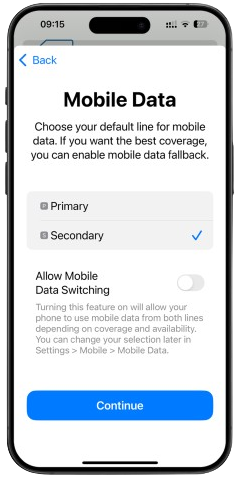 |
 |
10 - Set the eSIM line for Mobile Data :
|
|
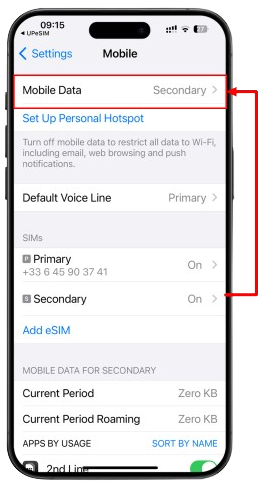
11 - Check the eSIM configuration :
|
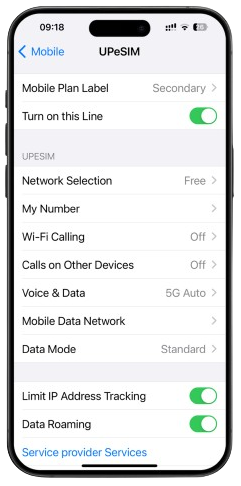 |